It is a pleasure to guest blog on The Cheeky Celiac this week! Thank you Kim for partnering with us for Celiac Awareness Month. Kim posted our story earlier this month, so be sure to read that when you get a chance to get to know us. Check out the giveaway of our products too.

It’s Dairy Free week at Gluten Free Mama, so we decided it would be fitting to create a dairy free recipe for you. In fact, you get two in one today! Summer is on my mind, and it makes me think of summer friendly recipes. Walking though the grocery store, I came upon a bag of Key Limes on sale and thought, “Key Lime Bars are a perfectly refreshing summer treat!” Pair these with some candied Key Limes if you have extra time on your hands for an even more special treat! Happy summer and Enjoy eating gluten free!
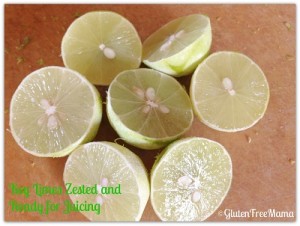
A couple of tips before you get started. Zest all the key limes you are going to use before juicing. Any extra zest can be placed in a Ziploc bag and frozen for use at a later time. Using a lemon or lime juicer works best for getting the maximum juice out of the Key Limes. Be sure none of the small seeds get into the juice. Be careful not to overbake the bars, as they will dry out. You want to look for the consistency of a brownie. Either just top these with Key Lime Glaze or have fun with it and cut glazed bars into squares and add Candied Key Limes on each piece. Or toast some coconut and sprinkle over the glaze. Either way these bars are sure to be a treat!
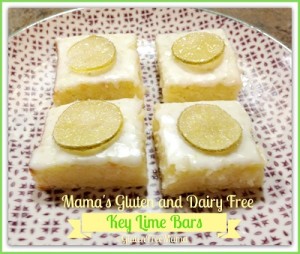
Mama’s Gluten Free Dairy Free Key Lime Bars
Ingredients
¾ cup Mama’s Almond or Coconut Blend (Mama used coconut as it pairs nicely with key limes)
½ tsp. sea salt
1 cup sugar
3 eggs
¼ cup fresh Key Lime juice (You can use limes if key limes are not in season)
1 Tbsp. Key Lime zest
½ cup dairy free buttery sticks or margarine, melted (Mama uses Spectrum Soy Free)
Glaze
1 cup powdered sugar
1 tsp. Key Lime zest
2-3 Tbsp. Key Lime juice
Directions for bars
Preheat oven to 350 degrees.
In a small bowl, combine flour, xanthan gum and salt. Mix and set aside.
In a medium bowl, beat eggs and sugar until frothy. Add key lime juice and zest. Pour in cooled, melted dairy free margarine. Mix well. Add flour mixture and mix just until all the ingredients are combined.
Lightly spray 8×8 pan with cooking spray. Spread batter into pan.
Bake for 25-28 minutes. Don’t overbake. You will know it’s done when the top starts to brown and a toothpick inserted comes back clean. You can also touch the top and if it slightly bounces back, it is done.
Cool completely. Spread Key Lime Glaze on top.
GFM Tip: If desired, sprinkle the top with coconut or toasted coconut, or add cut into bars and add a candied lime to each piece.
Glaze Directions
Mix together powdered sugar, zest and 2 Tbsp. of Key Lime juice. Add more lime juice as needed to get a nice spreading consistency.
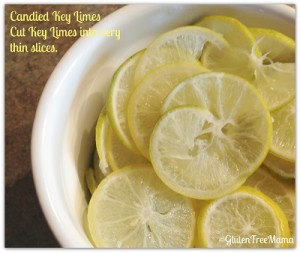
Candied Key Limes
Ingredients
4-6 Key Limes, sliced very thin
1 cup warm water
1 cup sugar
¼ cup sugar
Fill medium sauce pan with water and bring to a boil. Blanch key lime slices in boiling water for 2-3 minutes. Drain using colander and set key limes aside.
In the same pan, bring 1 cup warm water and 1 cup sugar to a boil. Return key limes to boiling sugar mixture. Stirring occasionally, simmer key limes in sugar mixture for about 12-18 minutes. Once the white pith part of the key limes starts to become translucent they are done. Note: the boiling sugar water should be just a gentle boil. Drain off the limes in a colander, again. Spread out limes either in a single layer in colander to continue to allow key limes to dry out for about an hour, or transfer to a cooling rack. Put ¼ cup sugar in a small bowl. Coat both sides of each key lime in the sugar. Lay each coated key lime in a single layer on a piece of parchment paper or a plate. Use limes as garnish on Key Lime Bars, Key Lime Cupcakes and more!


 May 18th, 2014
  GFKimAZ
 Posted in
  Tags:
Tags: 


[…] Click here for original recipe! Ingredients: […]
Kim, I’m so glad I’m not celiac; it must be quite a challenge, like any chronic disease. But at least cooking is not the challenge it once was, thanks to such marvelous recipes as this one and others on your site! I must make this one for my gluten-free friends (and the rest of us will enjoy it as well!).
Jean,
Thank you so much for the kind words. As you can tell, I haven’t logged into my blog’s dashboard in FOREVER 🙂
After taking an extended hiatus and returning to school for Integrative Nutrition, I’m slowly easing back into some posts. In my case, I’ll be aiming for quality versus quantity. Are we following each other on Instagram? If not, my handle is the same as Twitter GFKimAZ.
You are 100% correct by saying living gluten free isn’t quite as challenging as it once was. I prefer cooking from scratch as you do. In the future (as in the past) the only product reviews that will be done via our blog will be of tremendous quality. Just because it’s gluten free, doesn’t mean it is healthy. Right?
Be Well!
Kim